


.webp)


Transferring Your Website

The following steps will outline how to prepare for our team to transfer your Webflow site to you.
Verify your account by confirming your email.
Click the link in the email sent from Webflow to confirm your account.
Accept the Website Transfer.
Once Modiphy has initiated the transfer, you will receive an email and see a prompt on your Dashboard to accept the site transfer. When accepting, simply choose your workspace from the dropdown and choose accept
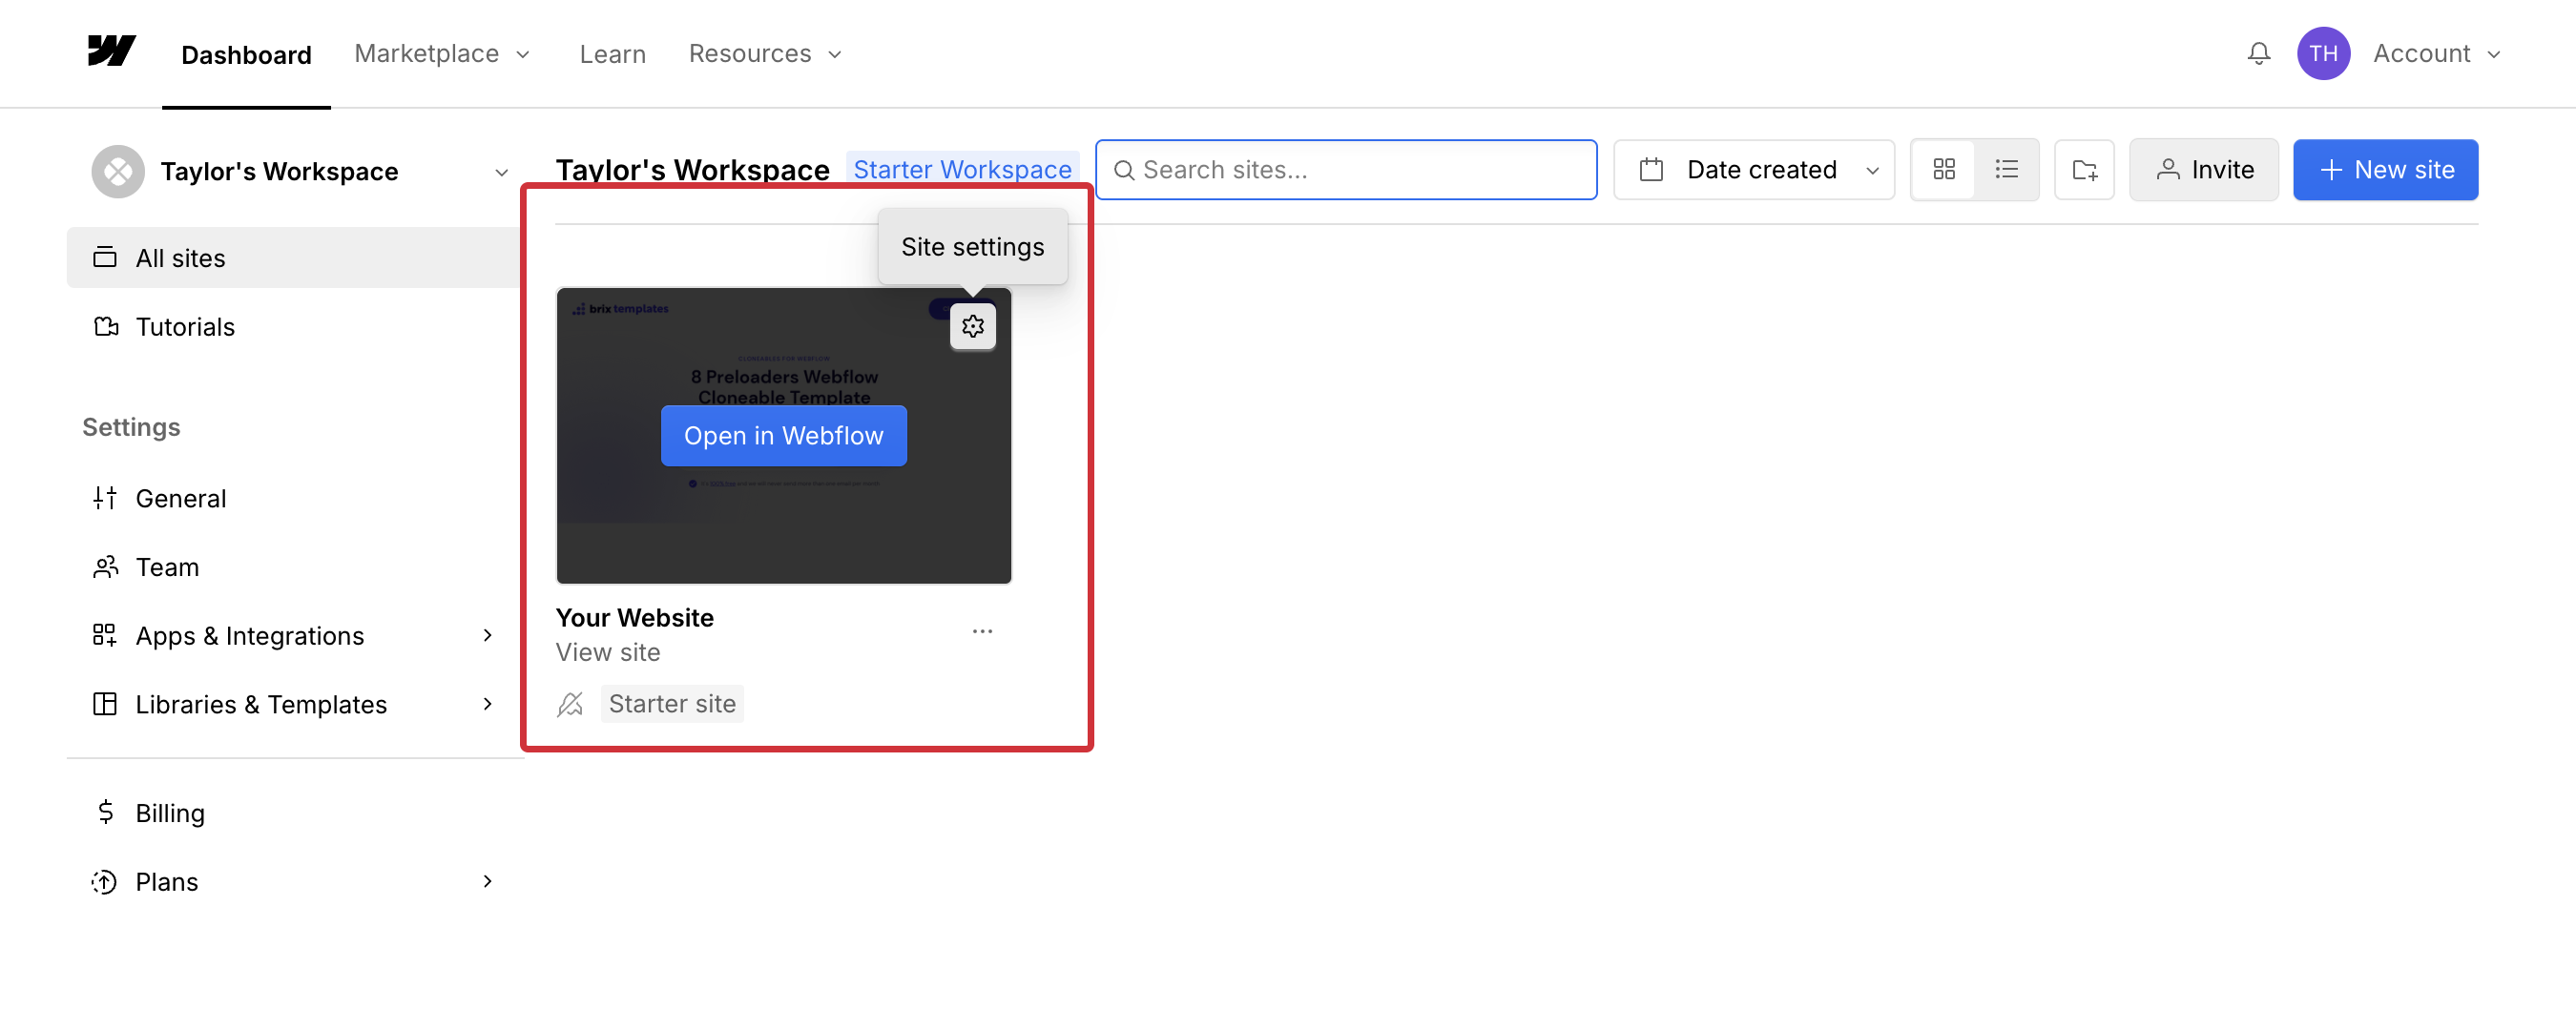
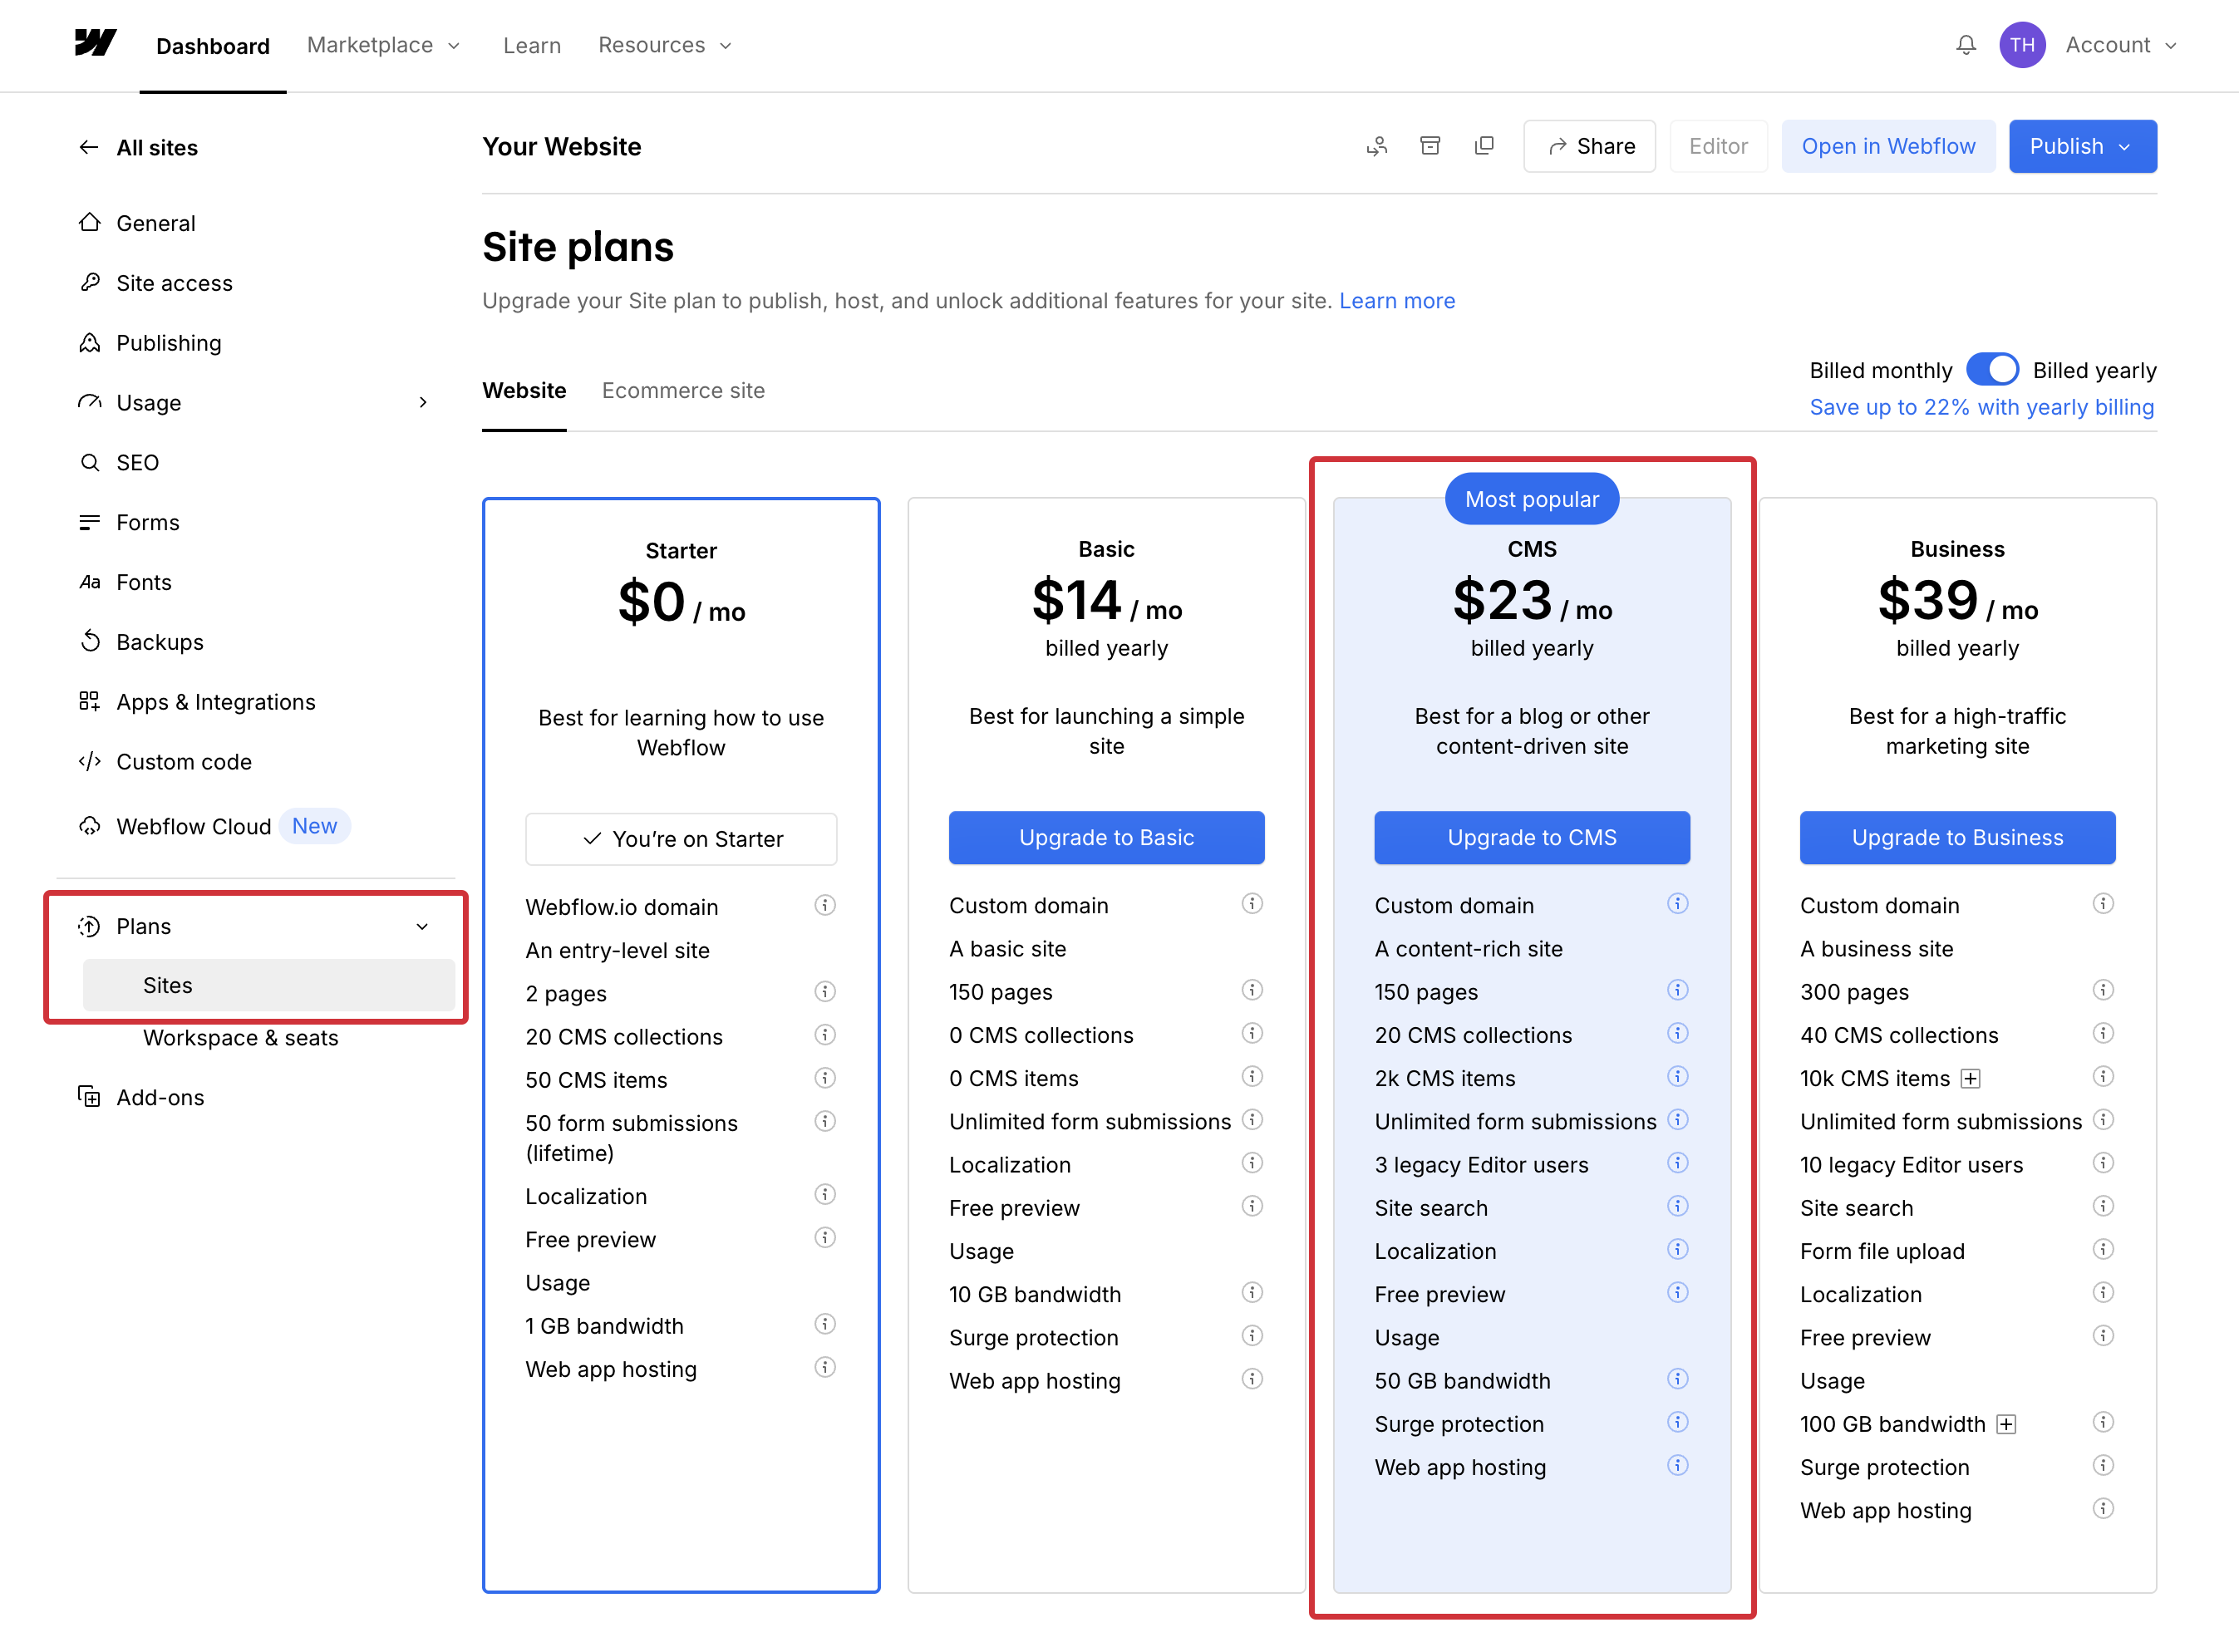
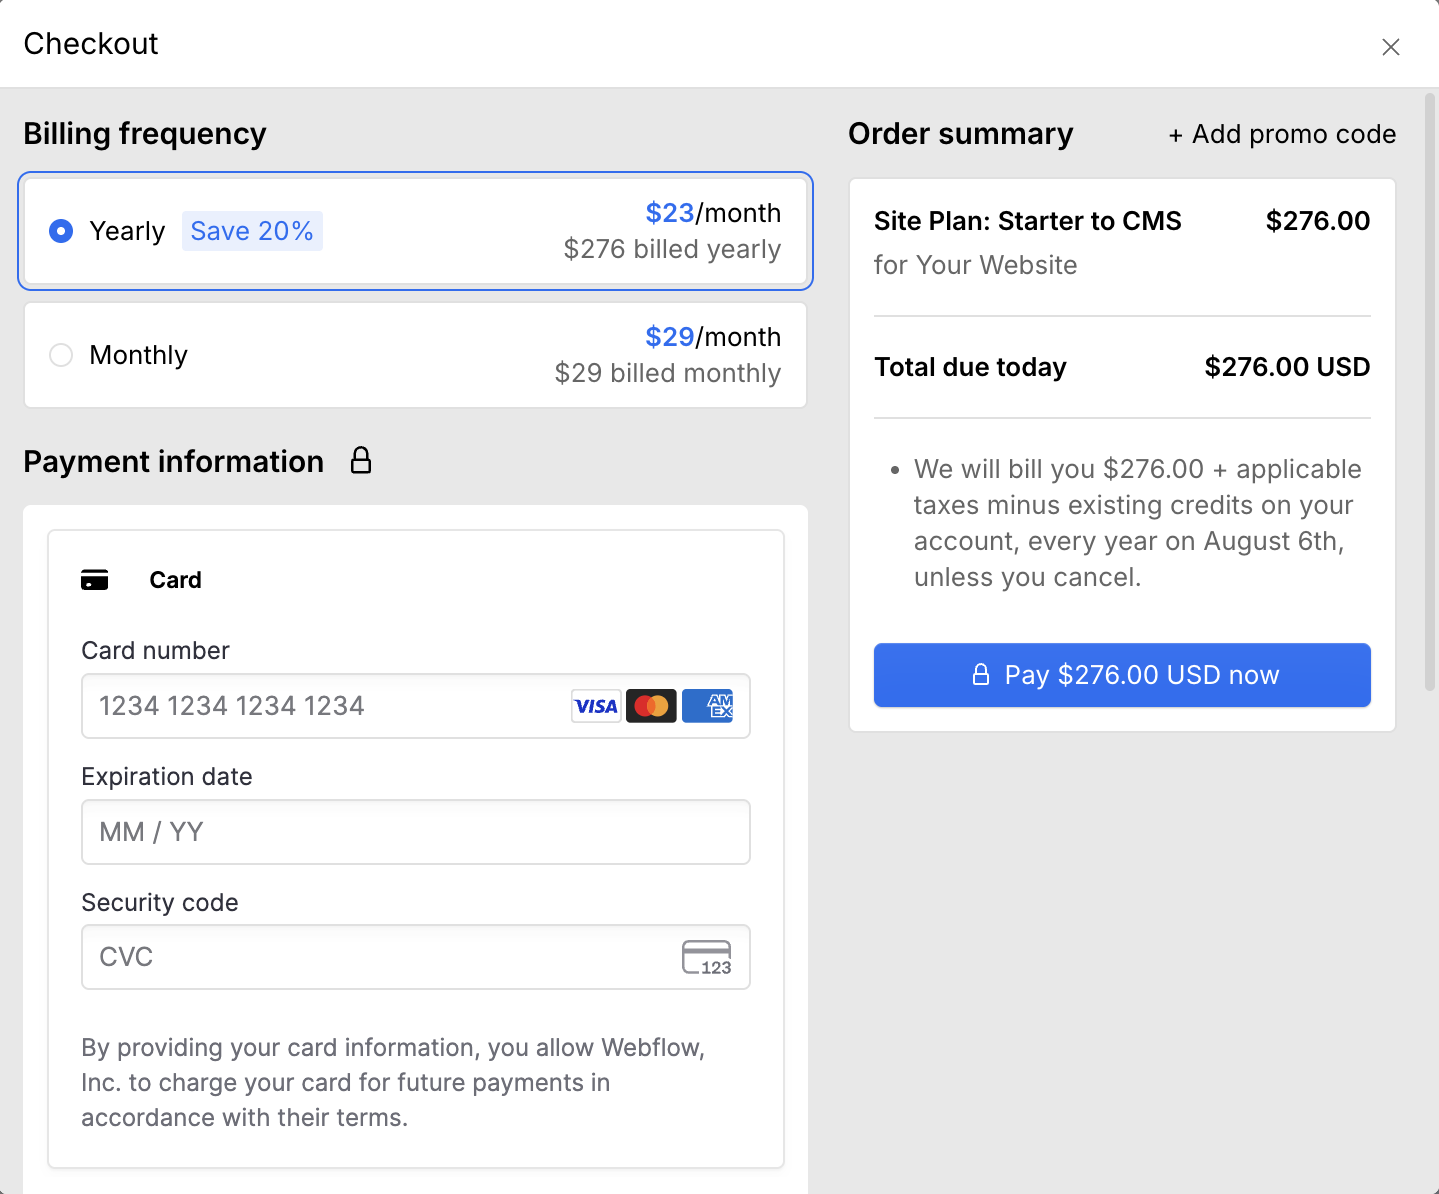
Add a Site Plan to your Website.
In order to get your website published (or to ensure it stays published), you will need to add a pay for a Site Plan.
Hover over your website in the Dashboard and click on the settings gear icon. Then navigate to Plans > Sites > CMS.
Note that you do not need to purchase a Workspace Plan unless you would like to have multiple users in your Webflow Workspace. This does not include any Modiphy team members invited to access your site.
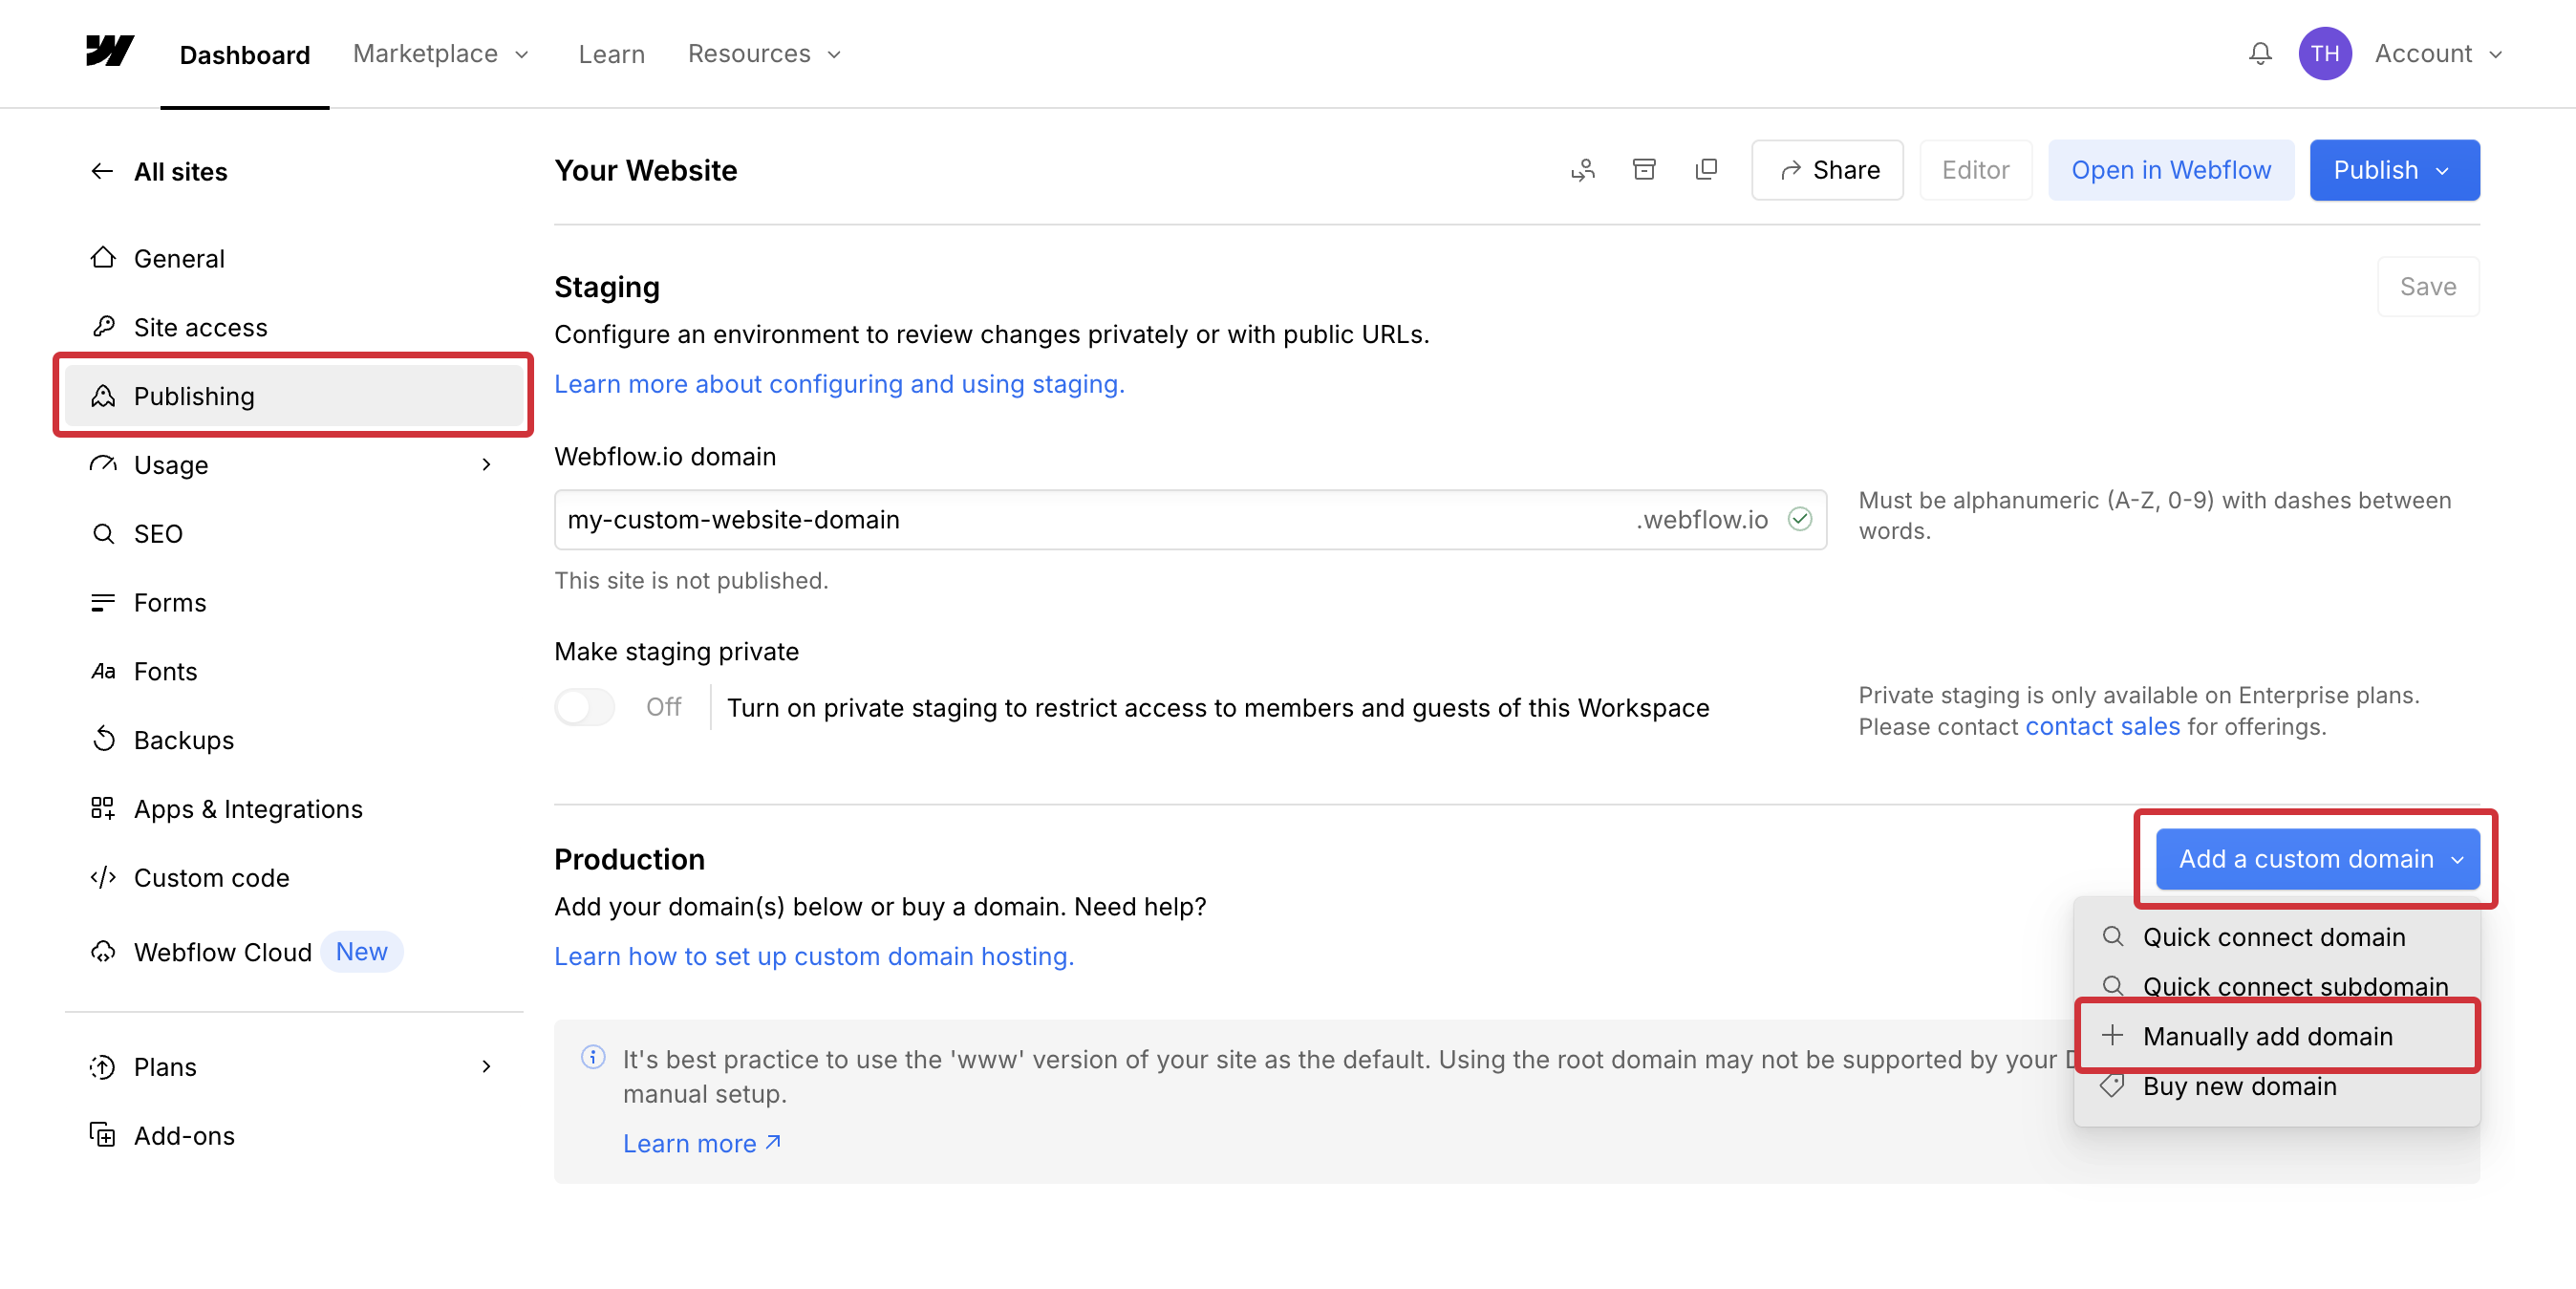
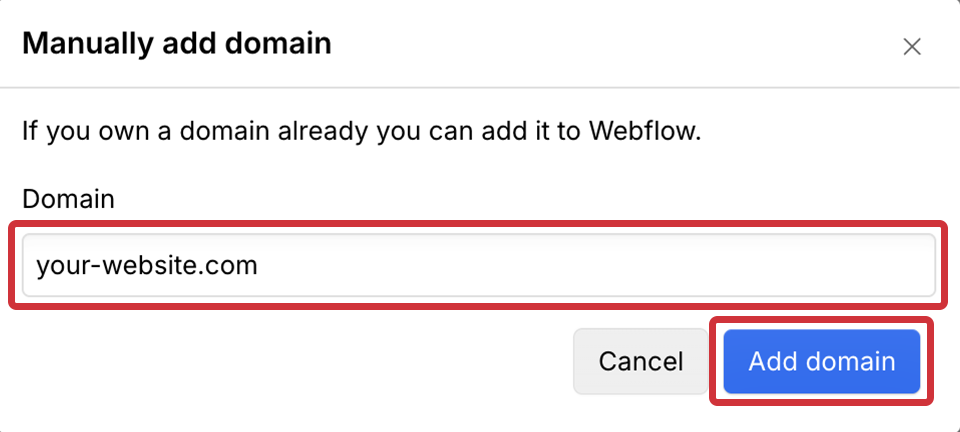
Add domain and publish the website.
After purchasing a site plan, navigate to the Publishing settings. Under Production, click Add a custom domain > Manually add domain. Then type in your website url without www. or https://.
Once your domain is verified, click Publish then Publish to selected domains to ensure the site is live.
Note that you may need to configure your DNS records when adding your domain. To do so, please follow these steps or reach out to your IT provider.
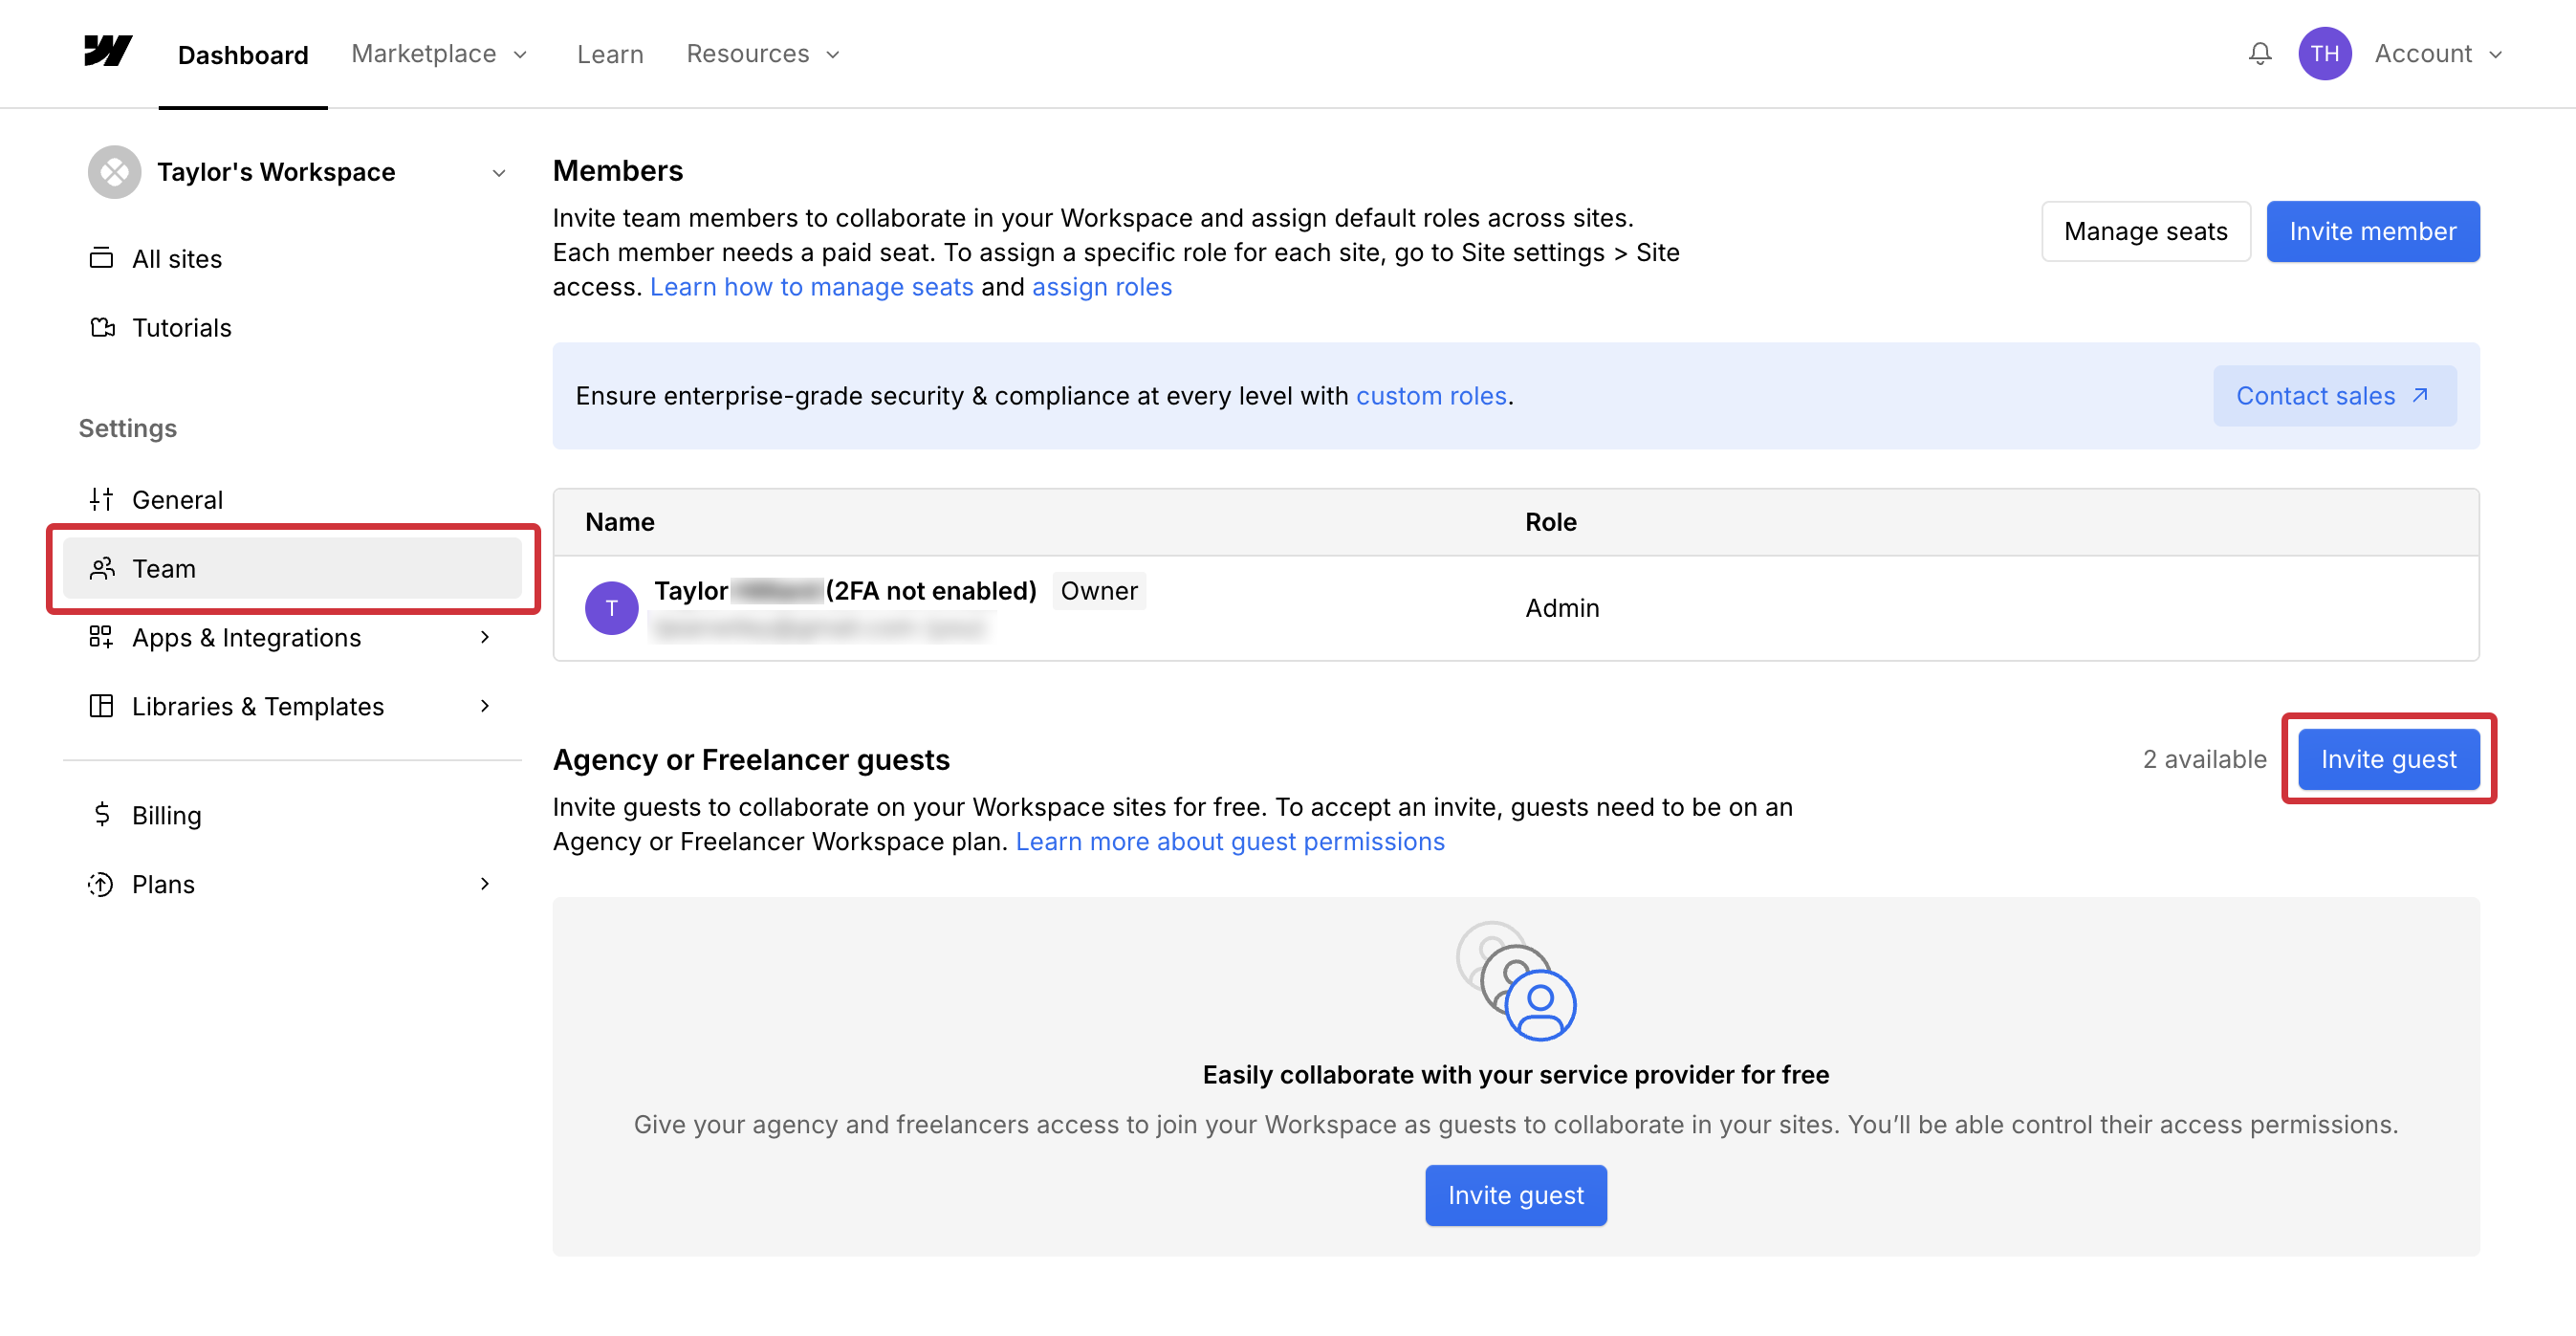
Add Modiphy to your Workspace.
If you are continuing service with Modiphy, you will need to add our team to your workspace so that we can access your website.
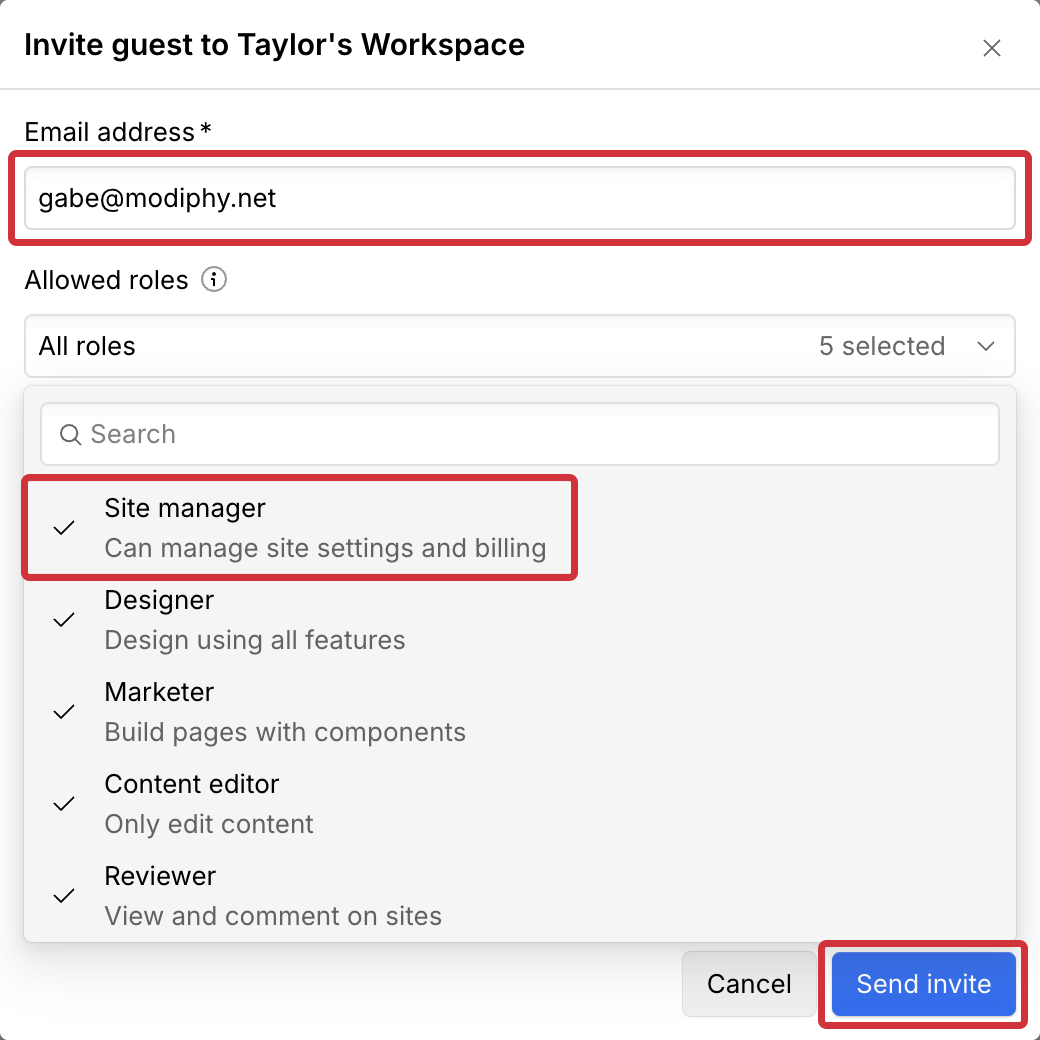
From the Dashboard, navigate to Team. Under Agency or Freelancer guests, click the Invite Guest button. Add the email gabe@modiphy.net and make sure that all roles are toggled on including Site Manager. Then click Invite.